We use cookies to make your experience better. To comply with the new e-Privacy directive, we need to ask for your consent to set the cookies. Learn more.
SKU
5005041
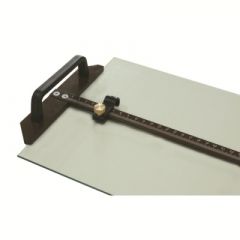
Auto slieter 31,6cm
Digital glass cutter, strip cutter or slitter
We recommend using the Toyo TC17 in combination with this digital glass cutter.
- Stopper
- Display
- mm / inch key
- Locking screw
- Origin button
- Parallel guide
- Clamping screws
- Handle
- Clamping plate
- Cutting head holder
- On / off key
- Abs / 0 key
- Battery cover
- Fine adjustment wheel
In stock
€309.33
Digital Glass Cutter
This is a precision instrument which has been put together with the greatest care. The digital glass cutter is suitable for all glass cutters whose cutting head is 5mm thick and 5 to 15 mm wide.
Operation.
For correct operation, we assume that you have a good stable cutting table, which has been fitted in advance with the optionally available stop guide. This stop guide is mounted parallel to the left side of your cutting table and should be perfectly perpendicular to the stop strip that runs parallel to the front of your cutting table. While cutting, move the digital glass cutter away from you. This allows you to work safely with the digital glass cutter.
Zeroing.
Slide the cutting head holder (without cutting head) all the way to the stop.
Switch on the digital glass cutter by briefly pressing the On/Off key (11).
Then pressing the Origin key (5) will cause the display to jump to zero.
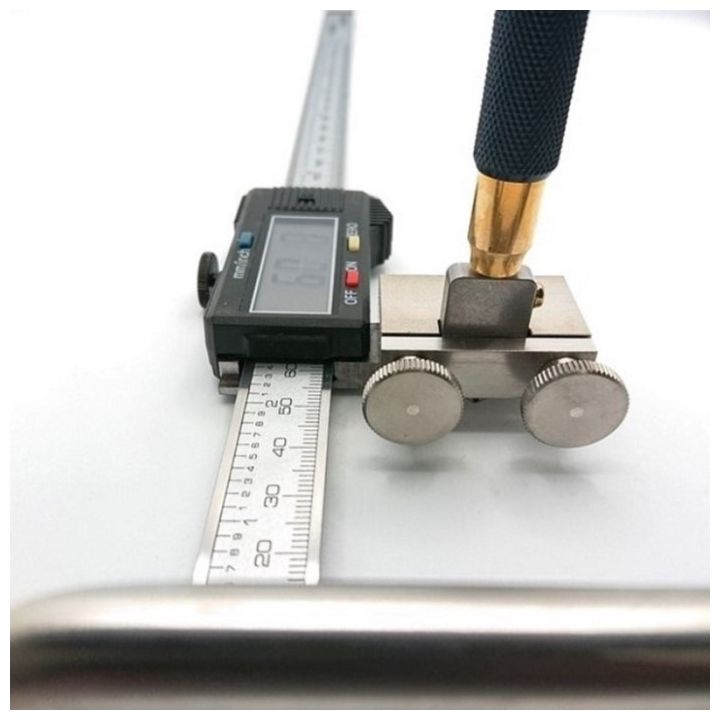
Insert glass cutter.
Place your glass cutter in the cutter holder (10), to do this loosen the clamping screws (7).
Make sure the blade extends about 5 mm below the cutting head holder.
Secure the cutting head by tightening the clamping screws (7).
TIP!!!
If you place the digital glass cutter with the stop on the stop guide, only the blade may touch the glass plate this way the glass can never be scratched by the digital glass cutter! (For Toyo TC-17, you can insert the glass cutter into the cutting head holder (10) up to the screw).
Set glass cutter.
Move the cutting head holder so that the desired size matches the value indicated by the display.
Use the fine adjustment wheel (14) to determine the position precisely.
Lock the cutting head holder by tightening the locking screws (7).
TIP!!!
By holding the parallel guide (6) with your right hand, you can operate the fine adjustment wheel very precisely with your right thumb.
Make sure you loosen the locking knob (4) sufficiently far before moving the cutting head holder, this will prevent wear on the locking knob and parallel guide.
Cutting.
Place the digital glass cutter with the stop (1) on the stop guide.
With your right hand, apply slight pressure on the cutting head and slide the digital glass cutter over the stop guide away from you.
Making multiple cuts in succession.
Your digital glass cutter has a so-called "Absolute" function. This allows you to make several cuts one after the other in a very simple way without calculating.
Proceed as follows:
Set the glass cutter to the desired size and make a cut.
Then press the "ABS/0" key (12) and the display will jump to zero, at the same time the indication "INC" will light up in the display.
From here you can easily set the cutting head to the next desired cut and make it.
If you want to make another cut press the "ABS/0" key (12) again. The display now shows the value from the original zero position. Pressing "ABS/0" key (12) again sets the current position back to zero after which you can again set the cutting head to the next cut etc. This does not change the original zero position.
Technical specifications:
Accuracy: 0.01 mm
Power supply: single 1,5 Volt button cell
Measuring speed: <1.5 m/sec.
Working temperature: 0 - +40 ºC
Relative humidity: <80 %.
Storage temperature: -10 - +60 ºC
Cutting head:
Thickness:5 - 5.5 mm
Width: 5 - 15 mm
Maintenance and faults:
Your digital glass cutter is a precision instrument, treat it as such. A clean environment and careful handling will increase its service life and reduce the likelihood of malfunctions.
Replacing the battery:
Abnormal readings in the display (flashing or even no display at all) indicate a low battery.
To replace the battery, slide the battery cover in the direction indicated on the cover.
Replace the battery with an equivalent one. Note that the flat plus + side is facing upwards
Fault:
Problem
Cause
Solution
Flashing display
Low battery voltage
Replace battery
No display
1. Low battery voltage
2. Bad contact
1. Replace the battery
2. Clean and adjust battery contacts if necessary
Display is jammed
Problems in the electronics
Remove battery and reinsert after 1 minute
| Glass cutting | Strip cutter |
|---|
Related Products